
A client sends over a folder of product shots and every file ends in .webp. You drop one into a slide deck and it refuses to embed. You try the retailer's upload portal and get the same error it threw all week. The images look perfect in a browser, which is exactly the problem: they were built for the browser and not much else.
Converting them isn't the hard part. The hard part is doing it without ending up with a softer image, a logo sitting on a black rectangle, or a file that looks fine on screen and muddy in print. This is the sequence I use, the settings worth changing, and the checks that catch the failures people notice only after a document has gone out.
A WebP to JPG job takes under a minute once the order is clear. People convert because JPG opens almost everywhere: office suites, print drivers, older upload forms, legacy viewers, email clients that reject anything modern. WebP was engineered for fast delivery, and Google validated it by re-encoding about 1,000,000 web images, mostly JPEGs, which came out an average of 39% smaller in Google's testing, as described in the Chromium blog's announcement. That efficiency is what makes the format awkward everywhere outside a browser.
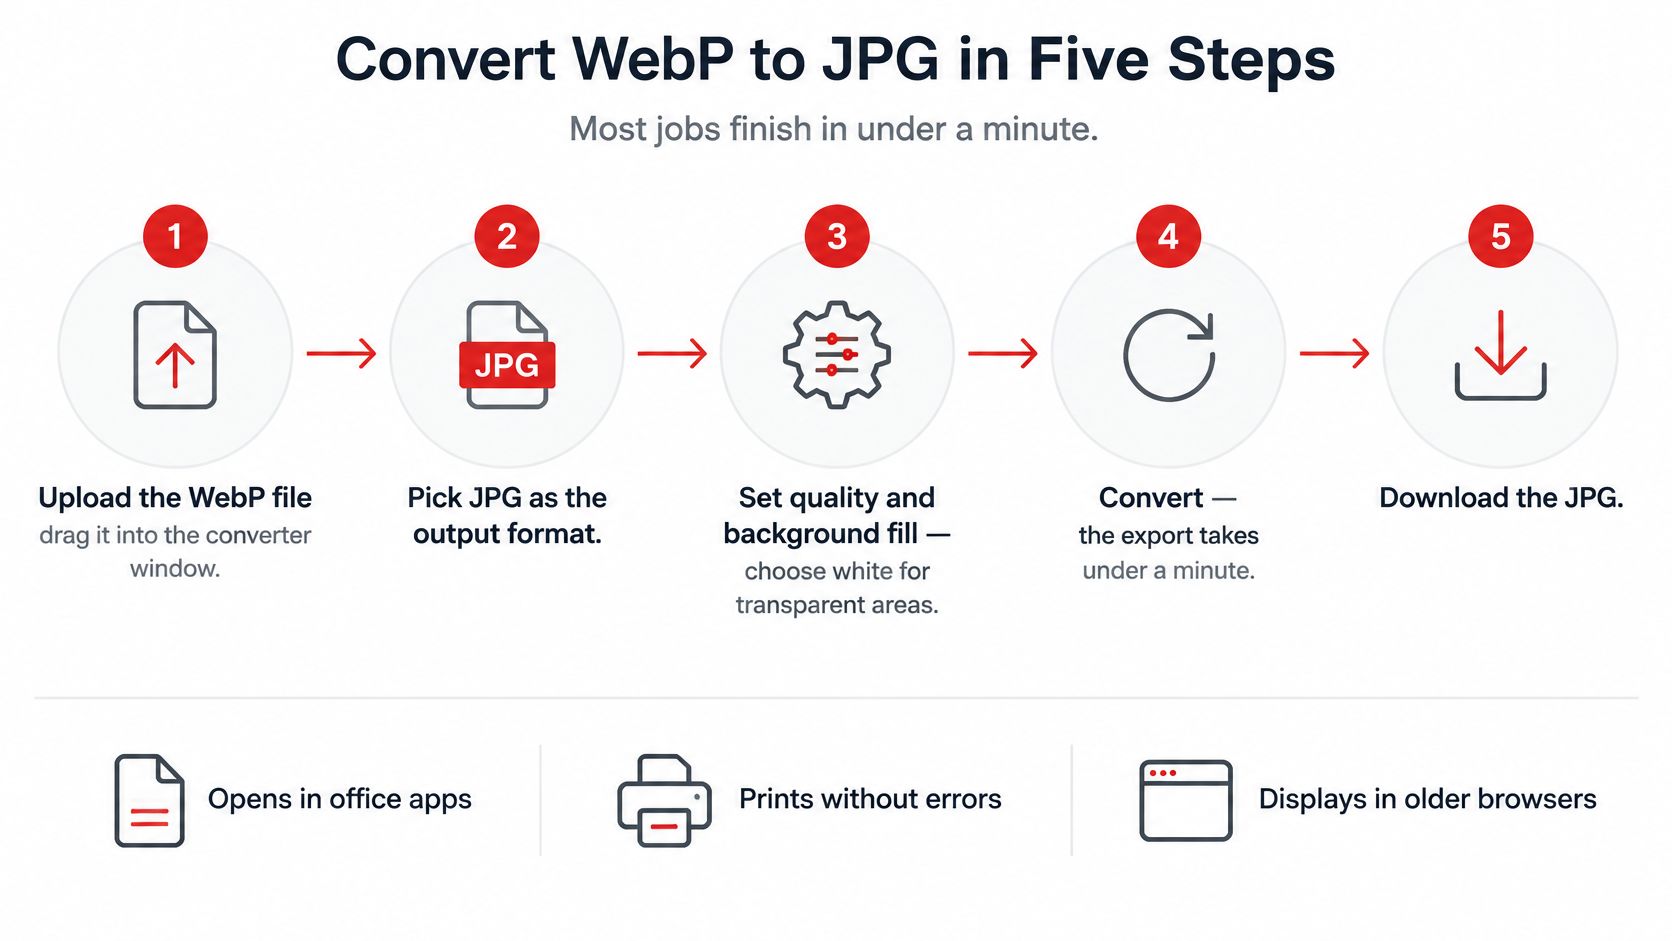
The sequence below is the one to hand anyone converting a handful of files or a whole folder.
Quality 90, 4:4:4 chroma sampling, white background covers most photographs and screenshots in a single pass. Only screen text, logos and line art need 95 or above. The ImageMagick command-line documentation sets out the scale clearly: quality runs from 1 to 100, photographs sit comfortably at 85 to 92, text and line art benefit from 95 to 100 with 4:4:4 sampling, and at 90 and above chroma channels stop being downsampled by default. It also notes a fallback of 92 when a tool can't estimate the source quality, which is why 90 is a sane default for mixed batches.
The five steps
- Duplicate the WebP and leave the original alone. The copy is your safety net. If the export crops, shifts colour or fails outright, you rerun from an untouched master instead of hunting down the file again.
- Open the WebP to JPG converter and add the file from your device. Adding from disk is more predictable than dragging from a browser tab, where you can accidentally grab a downscaled preview instead of the full-size asset.
- Choose JPG as the output and set quality. If the tool exposes a background or matte control, set it now rather than afterwards. JPEG has no alpha channel, so the encoder needs a fill colour at encode time.
- Start the conversion and let it finish. A single image is near-instant; a folder takes a little longer. Wait for the status to complete rather than downloading a partially written file.
- Download and reopen the JPG at 100% zoom. Look at the corners where transparency used to be, read the smallest text, compare tone against the original. Catching a defect here costs one more conversion. Catching it after publication costs a re-upload and an apology.
Tool interfaces get relabelled, so match the names on your screen to the intent here rather than hunting for an exact string. If your batch is mixed formats, the general image converter handles WebP, PNG, GIF and BMP in one run and outputs JPG, PNG or WebP.
Practical rule: keep the WebP as the master file for good. If the JPG looks wrong later, rerun from the WebP, never from the earlier JPG. Each lossy pass adds blocking and ringing that no higher quality setting can undo.
What you should be holding at the end is a JPG with the same pixel dimensions as the source, correct orientation, a matte colour you chose deliberately, and no visible softening at 100%. That's a verified export, not a file that merely changed extension.
Table of Contents
- The five steps
- JPEG Quality and Background Settings That Hold Up
- Transparent and Animated WebP Files Need a Plan
- Verify the Exported JPG and Fix What Looks Wrong
- Decide When to Keep WebP and When to Convert
JPEG Quality and Background Settings That Hold Up
Quality is a file-size dial with a visible cliff, and the cliff sits in a different place for a scenic outdoor photo than for a screenshot of a spreadsheet.
| Image type | JPEG quality | Chroma sampling | Background when transparent |
|---|---|---|---|
| Photographs, quality first | 90-92 | 4:4:4, the default at 90 and above | White or the page colour |
| Photographs, size first | 85-89 | 4:2:0 | White or the page colour |
| Screenshots and text | 95-100 | 4:4:4 | White, or the UI background colour |
| Logos and line art | 95-100 | 4:4:4 | The colour of the destination background |
| Product images on white | 90-92 | 4:4:4 | White |
Photographs are forgiving. Most camera and product shots at 85 to 92 are indistinguishable from the source at normal viewing distance, and the file is materially smaller than at 100. Pushing past 95 on a photo buys almost nothing except bytes.
Text and thin edges are not forgiving. Chroma subsampling discards colour resolution while keeping brightness resolution. At 4:2:0 the colour channel is sampled at a quarter of the pixel count, which is invisible in a sunset and obvious in a table with coloured headers, where red type against white turns into a fringe. Set 4:4:4 and quality 95 or higher for anything with type in it.
The background has to be decided before encoding, not after. White is the usual choice for documents and anything destined for a page with a white background; the page or brand colour is right for a web banner. There is no undo here: once the transparent pixels are filled, they're filled.
Quick comparison worth 30 seconds: convert one representative image at two quality levels, open both at 100% zoom and look at the smallest text and any coloured edge. Keep the smaller file only if it still reads cleanly.
If a verified JPG is heavier than you'd like, run it through Compress Image afterwards instead of dropping quality below the point where text survives. Compression on a finished JPG is far less damaging than starving the encode in the first place.
Transparent and Animated WebP Files Need a Plan
JPEG has no alpha channel. That one sentence explains most of the damage people see after conversion, and it's the part basic guides skip when they describe the job as a renamed extension.
Say a bakery's logo has a soft drop shadow and normally sits on a dark banner. Convert that file with the default white matte and the shadow becomes a pale grey box around the mark, obvious the moment it lands on the banner. Composite it against the banner's own colour and the shadow disappears into the background the way it should. The matte is a design decision, not a technical detail.
The WebP developer documentation makes the trade-off explicit: WebP can hold transparency, animation and either lossy or lossless pixel data, and lossy WebP files commonly run 25% to 34% smaller than comparable JPEGs at equivalent quality. JPG preserves neither transparency nor animation. Something has to give, and you should choose which.
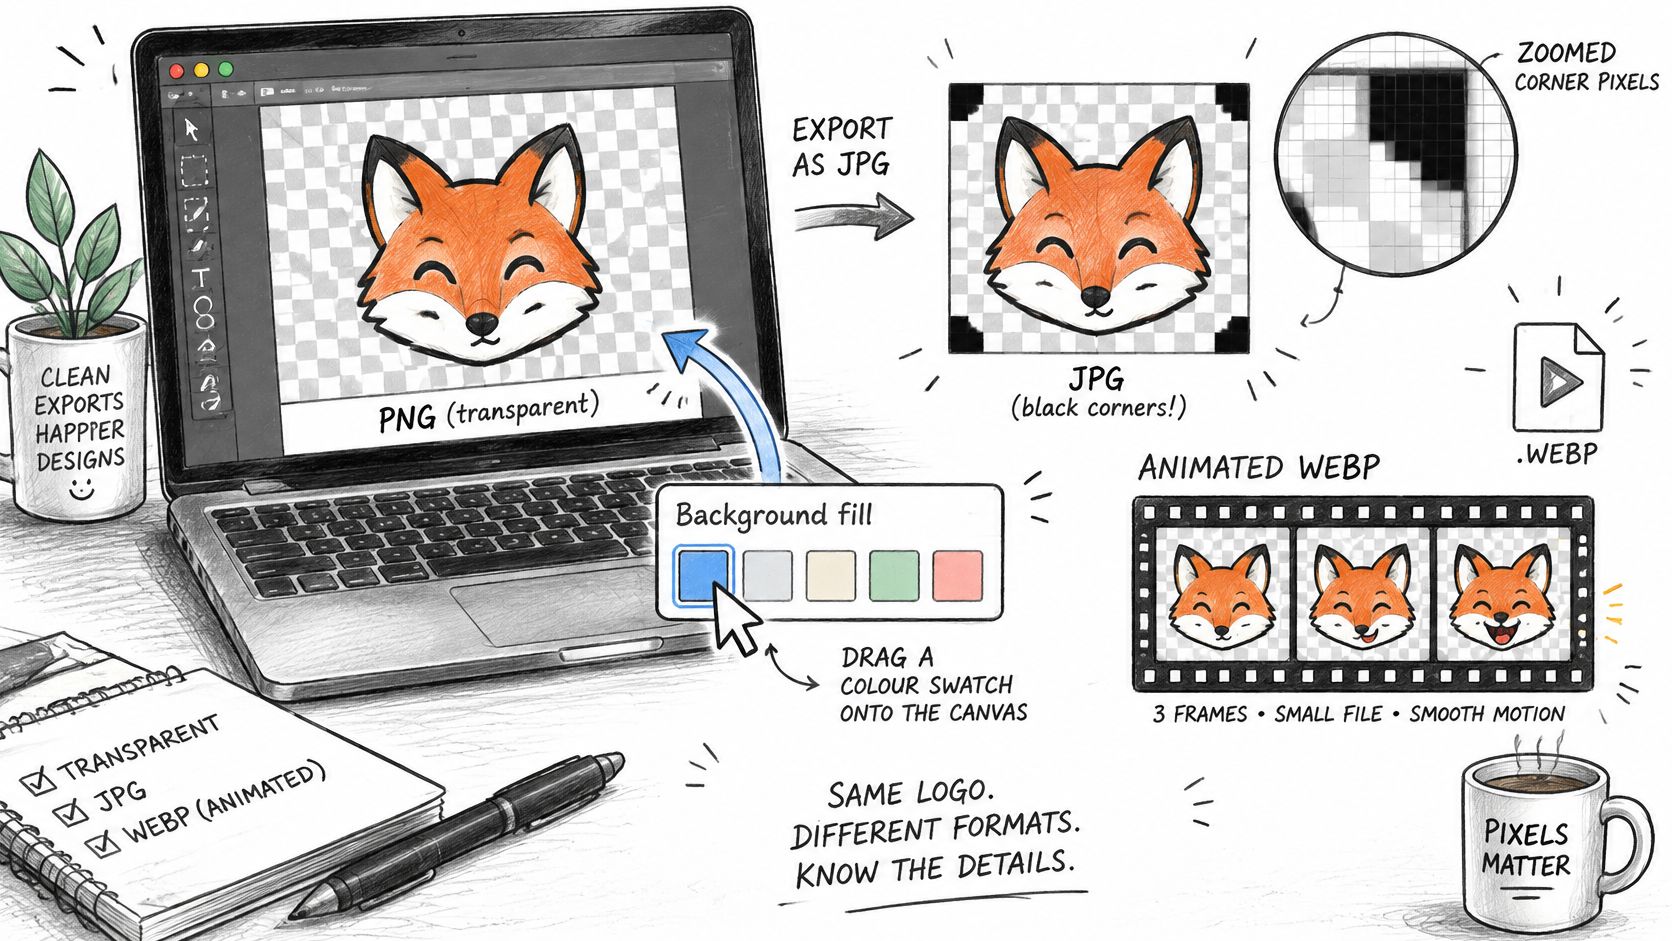
Test both candidate mattes against the intended destination before committing. A logo that looks right on white can look fringed on cream because the anti-aliased edge pixels were blended against the wrong colour.
Animated WebP needs its own decision
- First frame only works when the still image carries the message and the motion is decoration. Export it, then confirm the frame you got is a sensible one rather than a blank opening frame.
- A series of JPGs suits a short sequence you'll place manually, such as steps in a process diagram. Name them in order so they stay sorted.
- Keep motion in a format built for it. If the animation is the point, JPG is the wrong destination. A GIF or a video file serves the reader better than a flattened still.
A lossless WebP can only become a lossy JPG. No setting preserves the pixels, because the JPEG encoder is doing new compression work on decoded pixels. Treat conversion as a compatibility move, not a size optimization. When the destination will take PNG, WebP to PNG keeps transparency intact and sidesteps the matte question entirely.
Verify the Exported JPG and Fix What Looks Wrong
A file that opens isn't a file that's correct. The defects below range from immediately obvious to invisible until the image reaches a client, a printer or a public page, and one review pass catches nearly all of them.
The review pass, in order.
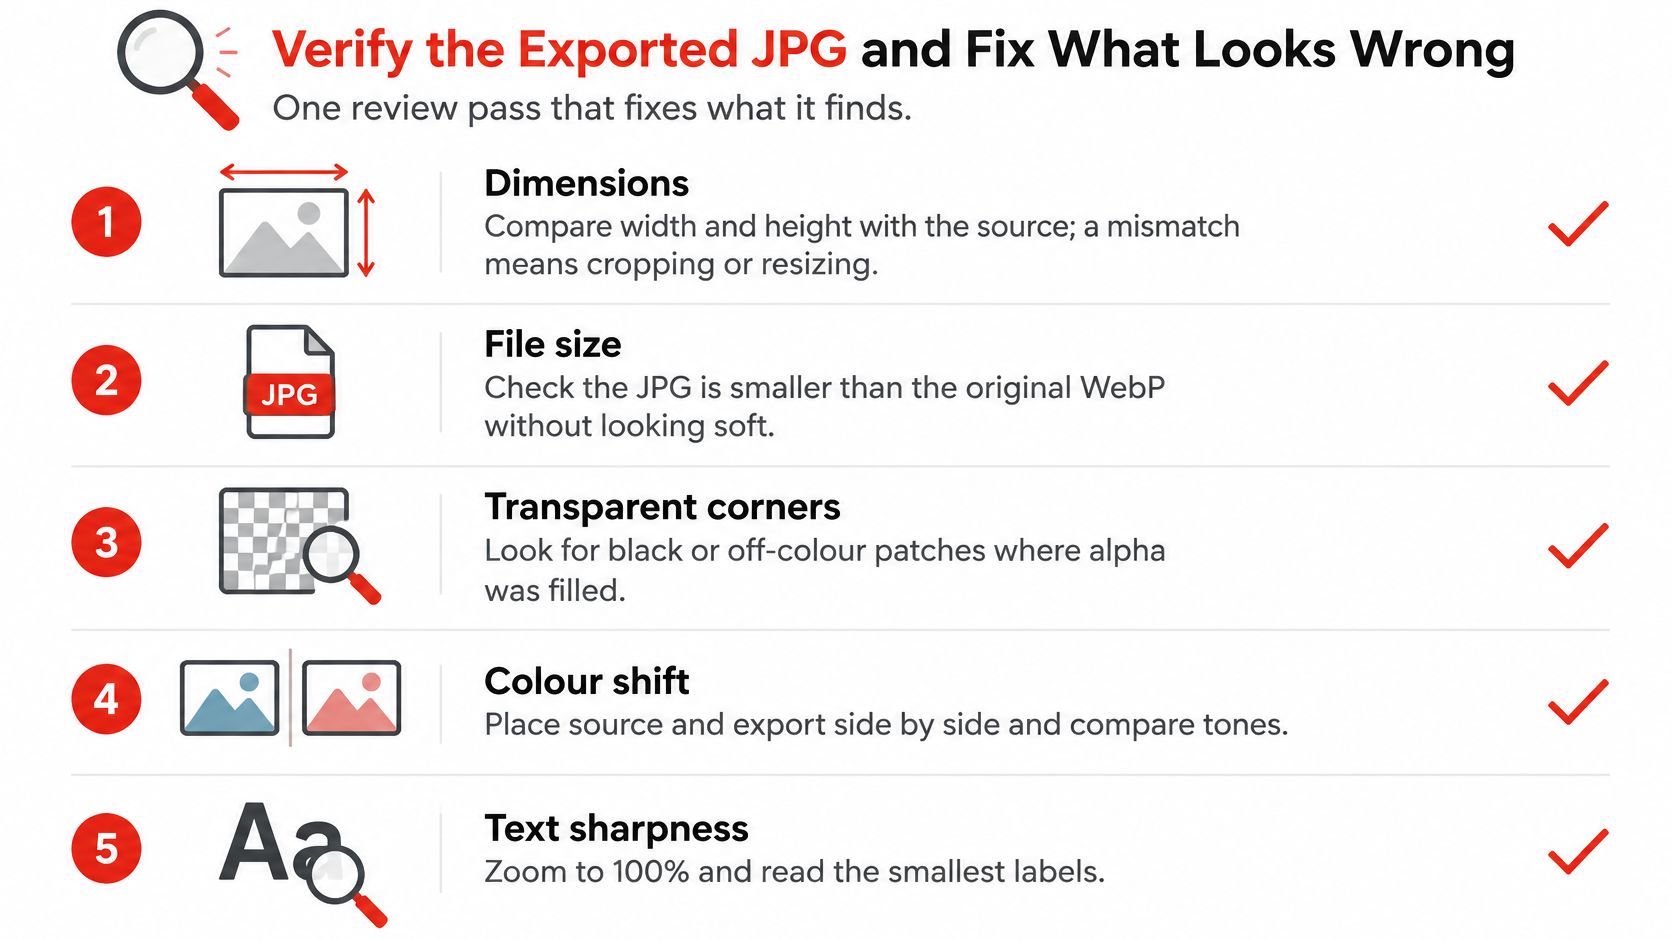
- Dimensions. Compare width and height against the source. A mismatch means something in the chain cropped or resized, and a portal that demands an exact width will punish it. If you need a specific size, set it deliberately with Resize Image rather than accepting whatever came out.
- Transparency. Zoom to 100% and inspect corners, soft shadows and the spaces between letters. Filled areas must match the matte you chose. Black patches mean the alpha was flattened against black, which is the classic failure.
- Orientation. A phone photo that appears sideways carried an EXIF orientation tag the encoder never applied. Rotating the JPG afterwards fixes the look but leaves the tag in place, so another viewer can flip it back. Apply orientation before encoding.
- Colour. Compare source and export in a colour-managed viewer. Keep the ICC profile when accuracy matters, such as catalogue images or brand assets, and normalize to sRGB for general web delivery. A dropped profile turns a wide-gamut image dull; a mismatched one pushes it oversaturated.
- Metadata. WebP can carry EXIF, GPS, XMP and ICC fields, and RFC 9649 defines them as optional, so a conversion can discard, preserve or rewrite each one depending on the tool. Browser-based re-encoding typically rebuilds the image from pixels and can drop non-pixel data, but don't treat that as a privacy scrub until you've opened the output and confirmed the GPS and author fields are gone. For ID scans, legal exhibits or unreleased product shots, keep the original and prefer processing that stays on your own device.
Tooling defaults are conservative: the cwebp manual page records that metadata isn't carried across unless it's explicitly requested, and canvas-based exports write 96 dpi, which can change a print's physical size while the pixel grid stays identical.
Symptoms, causes and fixes
| Symptom | Likely cause | Fix |
|---|---|---|
| Transparent areas turn black | JPEG has no alpha channel | Composite onto white or a chosen matte colour before encoding |
| Colours look dull or oversaturated | Profile dropped or wide-gamut colours | Keep the ICC profile if accuracy matters, or convert to sRGB and check in a colour-managed viewer |
| Photo appears rotated | EXIF orientation not applied | Apply orientation before export and recheck |
| Coloured text looks blurry | Low quality or 4:2:0 chroma subsampling | Raise quality to 95 or higher and use 4:4:4 |
| JPG is larger than the WebP | Lossy re-encoding to JPEG | Accept the size or keep WebP if the destination allows it |
| Printed size differs | Canvas output stores 96 dpi | Set the print size in an editing app and recheck |
| Artifacts grow after a second conversion | Re-encoding an earlier JPG | Always convert from the original WebP |
A larger JPG is expected, not a bug: you've added a compression stage to a file that was already compressed efficiently. What you should never accept is a JPG that is both larger and softer, because that means the quality setting was too low and detail was thrown away for nothing.
If the file is headed for print, set the physical dimensions in an editing app rather than trusting the embedded resolution. A 2000-pixel-wide JPG tagged at 96 dpi describes a print roughly 21 inches across, which is not what anyone means by a six-inch photo.
Decide When to Keep WebP and When to Convert
Browser support stopped being the argument a while ago. WebP-capable browsers accounted for 96.09% of global browser market share in 2024, according to Wikipedia's summary of support data. Yet JPEG was still used by 77.7% of websites against WebP's 11.7%, based on Digital Information World's report of W3Techs figures.
Read those two numbers together and the picture is clear: almost every browser renders WebP, and most publishing pipelines still ship JPEG. The gap isn't technical capability, it's the long tail of tools, templates, printers, email clients and procurement portals that were built around JPG and never moved.
So the decision comes down to where the file is going, not which format is better in the abstract.
- Keep WebP when the image is served to a browser, when bandwidth matters, and when the CMS or framework accepts it without complaint.
- Convert a copy when the destination is an office application, a print service, an older editing suite, an upload form with a format whitelist, or a person who will open the attachment on an unknown device.
- Never overwrite the master. Store the WebP alongside the JPG so the next request for a different size or format starts from full quality.
The rule I'd apply: if you can't test the destination system yourself, convert and keep both. The cost is a duplicate file; the cost of a rejected upload at deadline is worse.
When transparency is what you need to preserve and JPG is the wrong answer, PNG to JPG is the opposite direction of the same problem, and the rest of the image tools hub covers resizing, cropping, watermarking and EXIF removal without leaving the browser.
Start with one test file. Convert it at quality 90 with the right matte, open it at 100% zoom, compare it against the WebP, and only then run the rest of the folder. One careful conversion teaches you more about your own images than any preset.
Every step in this guide runs in the browser at PDFWix, from the WebP to JPG converter to the compressor and resizer used in the verification pass, with no account required and no watermark stamped on your output. Drop in a single image or a whole folder, set the quality and background fill, and inspect the result at 100% before it goes anywhere. If your destination turns out to accept PNG instead, the same toolkit covers that route, so the conversion stays a two-minute job rather than a hunt for another site.