
To change a PDF's actual page size on a Mac, use Acrobat's Preflight fixup and enter target dimensions such as A4 at 595 × 842 points. For a smaller file, use Preview's Reduce File Size filter, while printing scale is a separate setting that changes the output size without changing the PDF page itself.
You're probably looking at a PDF that's too large to send, doesn't fit the paper in your printer, or needs to become A4 instead of Letter. macOS gives you a native route for the first two problems, but the clicks are different because PDFs don't have one universal “resize” command.
The mistake is treating file size, print scale, and page geometry as the same thing. Choose the wrong operation and you can end up with a blurry scan, a PDF that still reports the old paper size, or a document whose margins and form fields no longer line up. Here's the practical way to choose the right fix.
Table of Contents
- What Resizing a PDF on a Mac Actually Means
- Shrinking a PDF File Size in Preview
- Scaling a PDF for Printing on Mac
- Changing the Actual Page Dimensions
- Comparing Native and Browser-Based PDF Resize Tools
- Quick Checklist Before You Save Over the Original
What Resizing a PDF on a Mac Actually Means
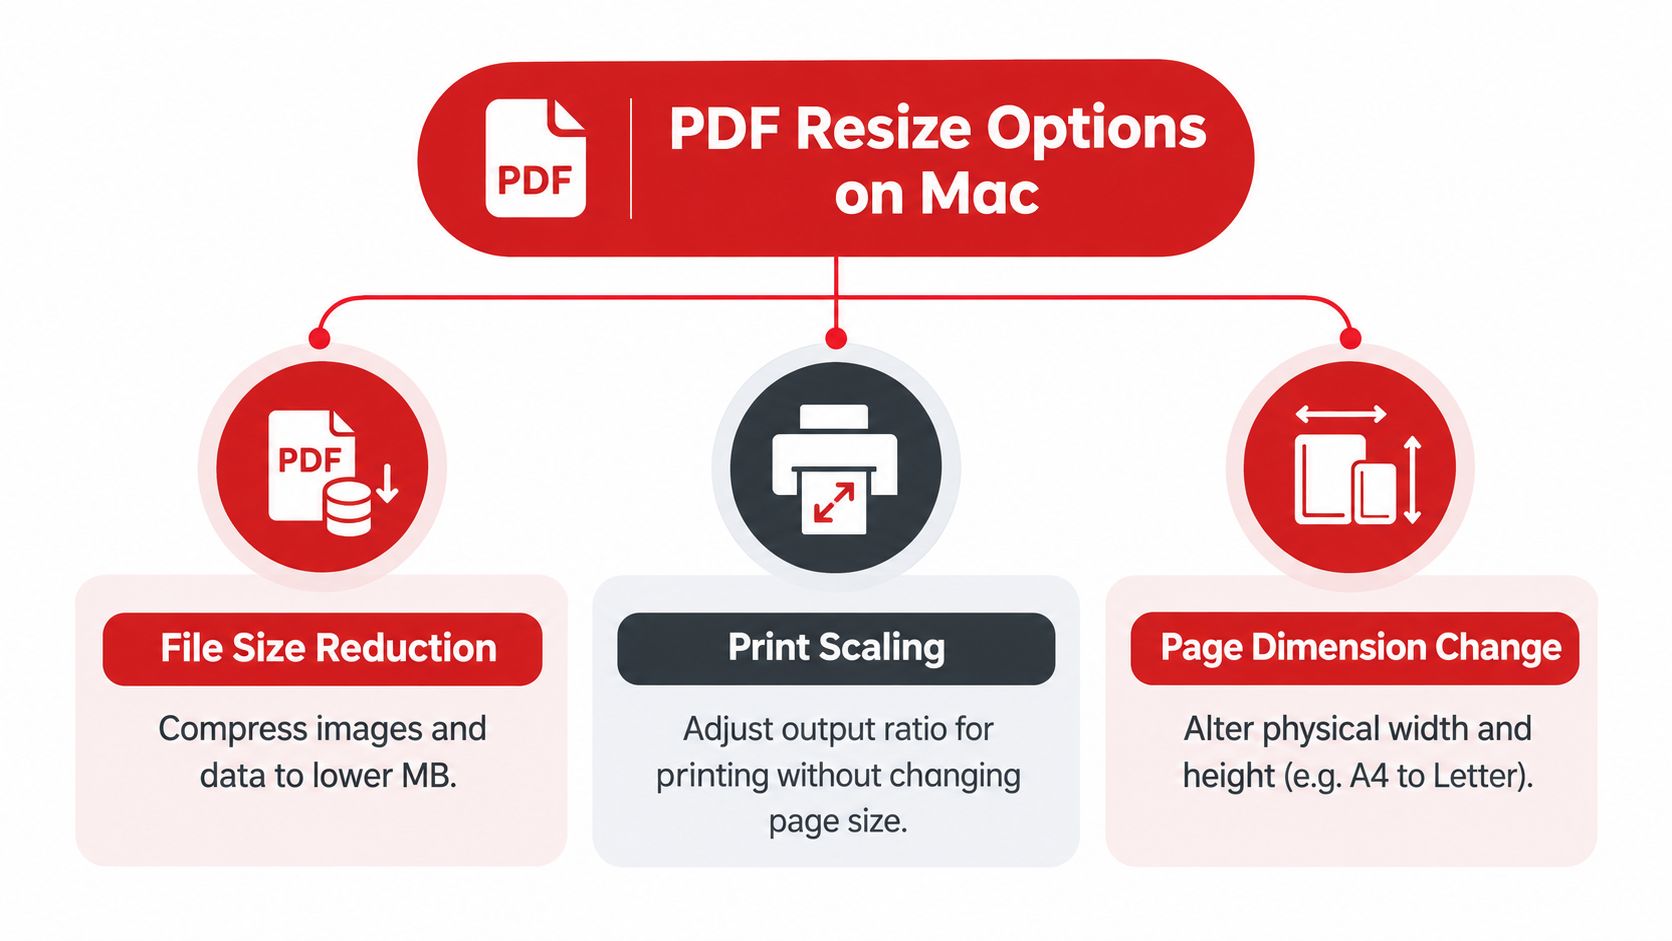
“Resize” describes three different operations.
File-size reduction means making the PDF occupy less storage space. Preview's File > Export > Reduce File Size workflow recompresses content, which is useful when a scanned document or image-heavy PDF is too large to share. It targets the file's internal data, not the physical width and height of each page. Apple documents this workflow in its guide to reducing the size of a PDF in Preview.
Print scaling changes how large the page content appears on paper. You can select a paper size, choose Scale to Fit, or enter a percentage in the print dialog. The resulting printout may be smaller or larger, but the PDF can still retain its original page geometry.
Page-dimension adjustment changes the actual page boundaries stored in the PDF. That's the operation you need when a file must permanently become A4, Letter, or Legal in every viewer and printer. PDF pages use fixed geometry, so changing the page itself requires a page-layout or preflight operation rather than ordinary zooming.
Pick the outcome before opening an app
Use this quick decision rule:
- Need fewer megabytes? Export a new copy from Preview with the Reduce File Size Quartz filter.
- Need the content to fit different paper? Use Preview's print scaling controls.
- Need the PDF to report a different page size? Use Acrobat's Preflight page fixup or a browser-based page-size editor.
Preview's zoom controls don't alter either the file size or the page geometry. They only change what you see on screen. That distinction saves you from repeatedly adjusting a document that was never being changed in the first place.
Shrinking a PDF File Size in Preview
Preview is the quickest choice when the PDF is too large to email, upload, or store. It includes a built-in Quartz filter that reduces file size without requiring a separate PDF application.
Start by preserving the original. In Finder, duplicate the PDF or use Preview's duplicate command, then give the working copy a clear name. Compression can reduce visual quality, especially in scanned documents and files dominated by embedded raster images, so you want the untouched version available.
Use Preview's export filter
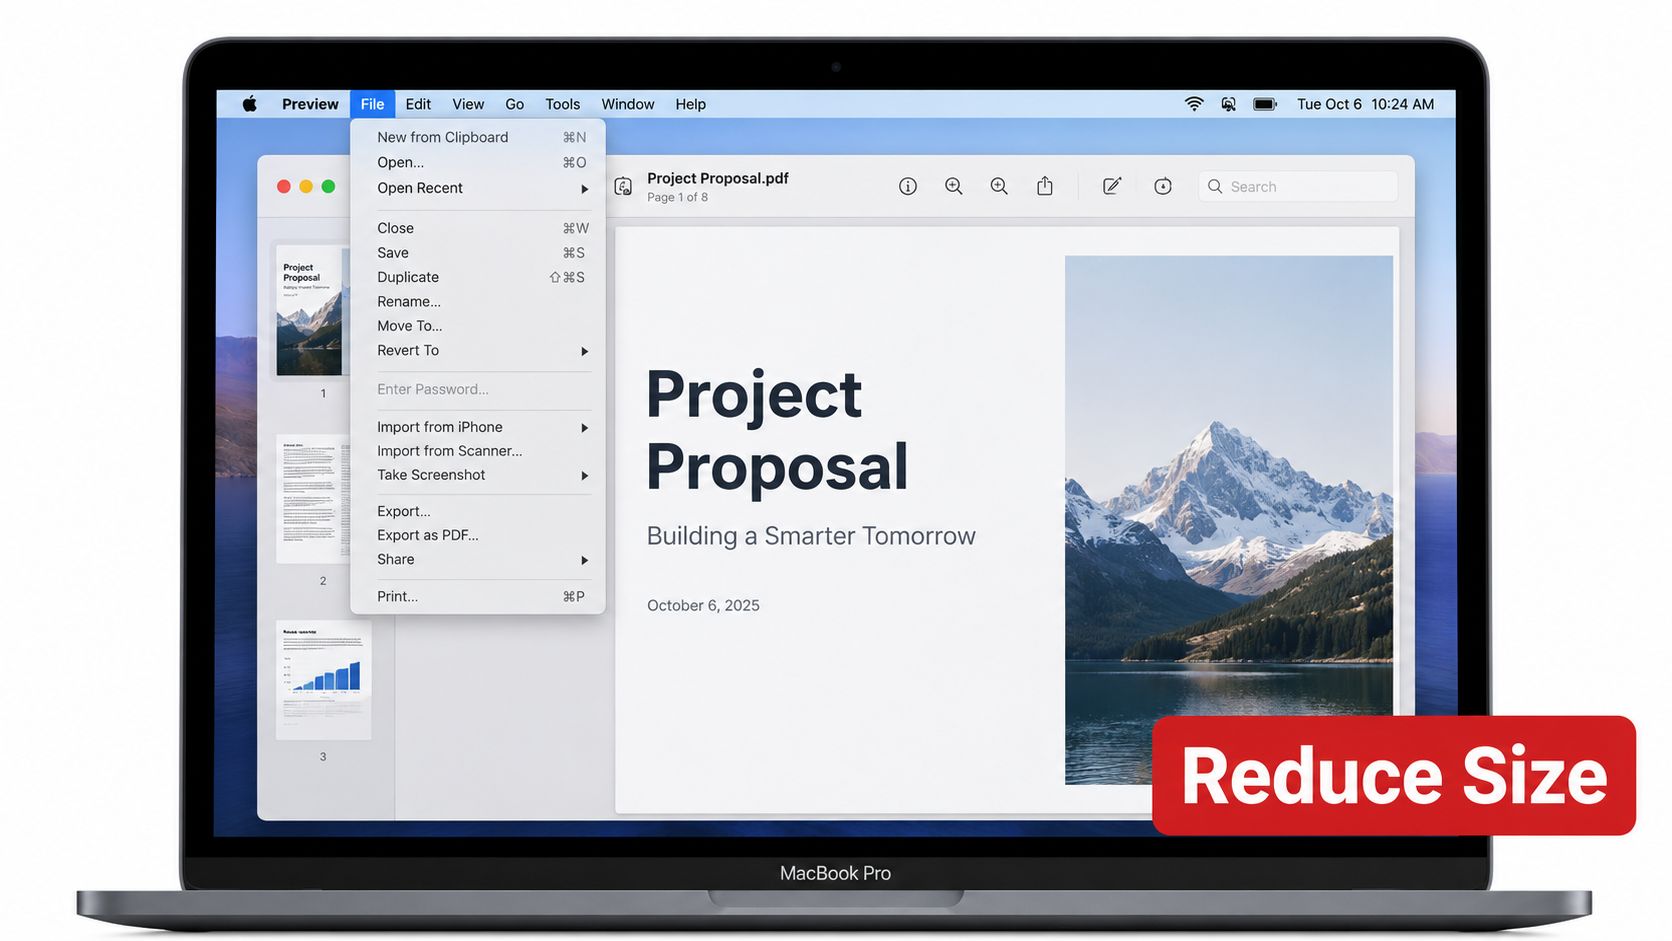
- Open the duplicate PDF in Preview.
- Choose File > Export.
- Set the format to PDF if Preview doesn't select it automatically.
- Open the Quartz Filter menu.
- Select Reduce File Size.
- Choose a new filename and save the exported copy.
Apple also lists export controls for Create Linearized PDF, which helps a document load faster in web browsers, Optimize images for screen, and Save images as JPEG, which applies image compression. These settings matter most when pages contain large scans, photographs, or other raster images. Text and vector artwork generally behave differently from those embedded images, so inspect the result rather than assuming every element will look identical.
Practical rule: Compress a copy first, then compare a photo-heavy page and a text-heavy page at the size you expect people to read them.
Preview's filter is deliberately simple. It doesn't give you a quality slider or a target file size, so it's not the right tool when you need fine control over image fidelity. If the exported copy looks soft, return to the original and use a more controlled PDF optimization workflow instead of repeatedly compressing the already-compressed file.
This process also does not reliably change page dimensions. A compressed A4 document remains an A4 document, even if its storage footprint is much smaller. For a more focused walkthrough of the same Mac workflow, see this guide to reducing a PDF file size on macOS.
Scaling a PDF for Printing on Mac
Use print scaling when the page is correct as a document but wrong for the sheet in your printer. This is common when content needs to fit a selected paper size, when you want a smaller handout, or when the printer is likely to crop the edges.
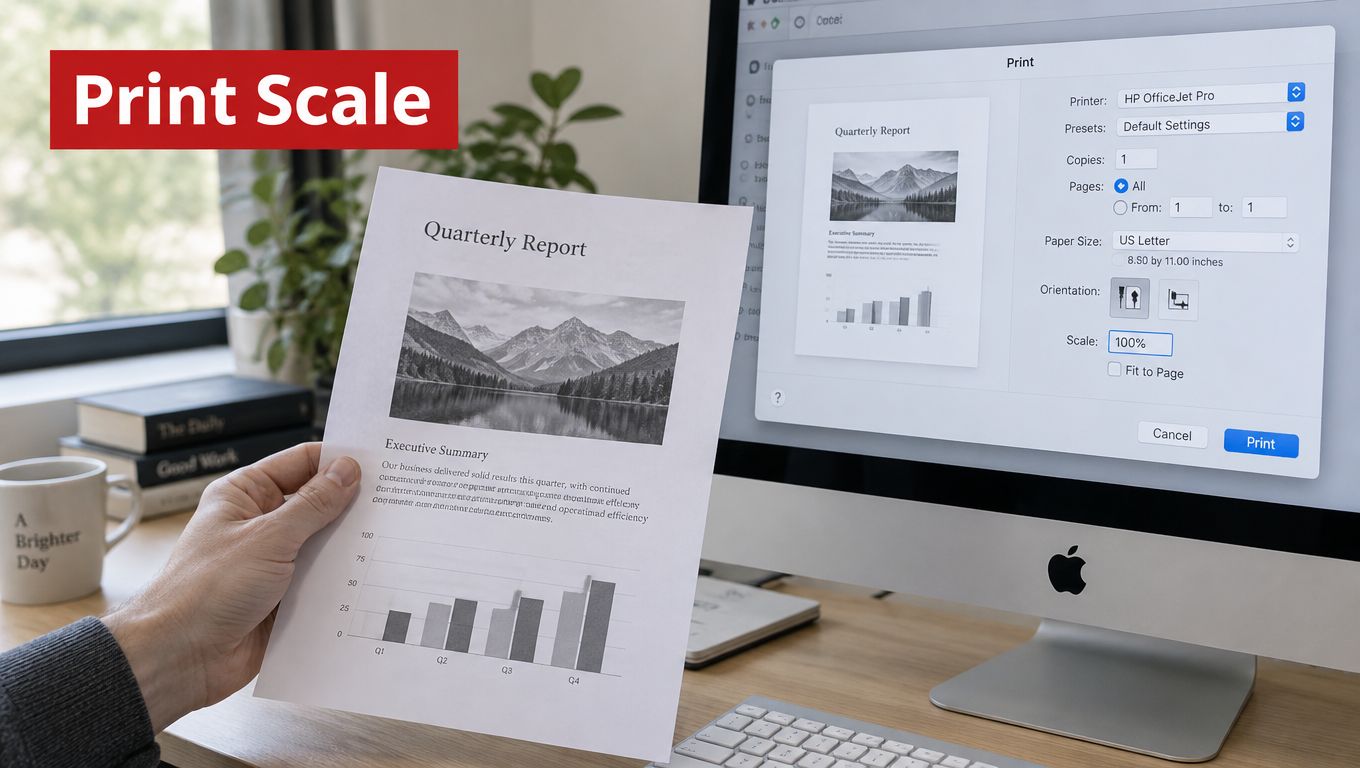
Open the PDF in Preview and press Command-P. Click Show Details if the full print panel isn't visible. Select the intended paper size, then look for the scaling controls. Depending on your macOS and printer setup, you can enter a custom percentage or choose a fit-to-paper option.
Choose fit or enter a percentage
Scale to Fit is the safer choice when you need the complete page to appear on the selected paper. Apple distinguishes between fitting the entire image, which helps avoid cropping, and filling the entire paper, which prioritizes coverage of the sheet. Filling the paper can trim content if the source and destination proportions don't match.
A custom percentage is useful when you know the target relationship. Calculate it as:
target dimension ÷ source dimension × 100
For example, fitting US Letter width to A4 width uses approximately 595 ÷ 612 × 100 = 97.2%, because US Letter is 612 × 792 points and A4 is 595 × 842 points, as documented in Adobe's guidance on scaling or resizing printed PDF pages. Use proportional fitting when possible. Applying independent width and height ratios can distort circles, photographs, logos, and text.
Save a print-ready PDF
If you want a new PDF with the print scaling applied, open the PDF in Preview, choose File > Print, reveal the detailed options, select the paper size and scaling behavior, then use the PDF menu in the print dialog to save the result as a new PDF.
This is a print-oriented conversion, not a page-box edit. The newly saved file may reflect the printed layout, but you should still check its margins, links, forms, annotations, and metadata afterward. Print-to-PDF can simplify or alter interactive content, particularly when the original document contains fields or other elements designed for digital use.
Preview also offers an Actual Size viewing mode. Use View > Actual Size when checking the result, but remember that the display can be configured to match physical print dimensions or to interpret a point as a screen pixel. The screen preview alone isn't proof that the physical print will be correct.
For a workflow focused specifically on page resizing and print output, use this guide to resizing PDF pages and print one representative page before producing the full document.
Changing the Actual Page Dimensions
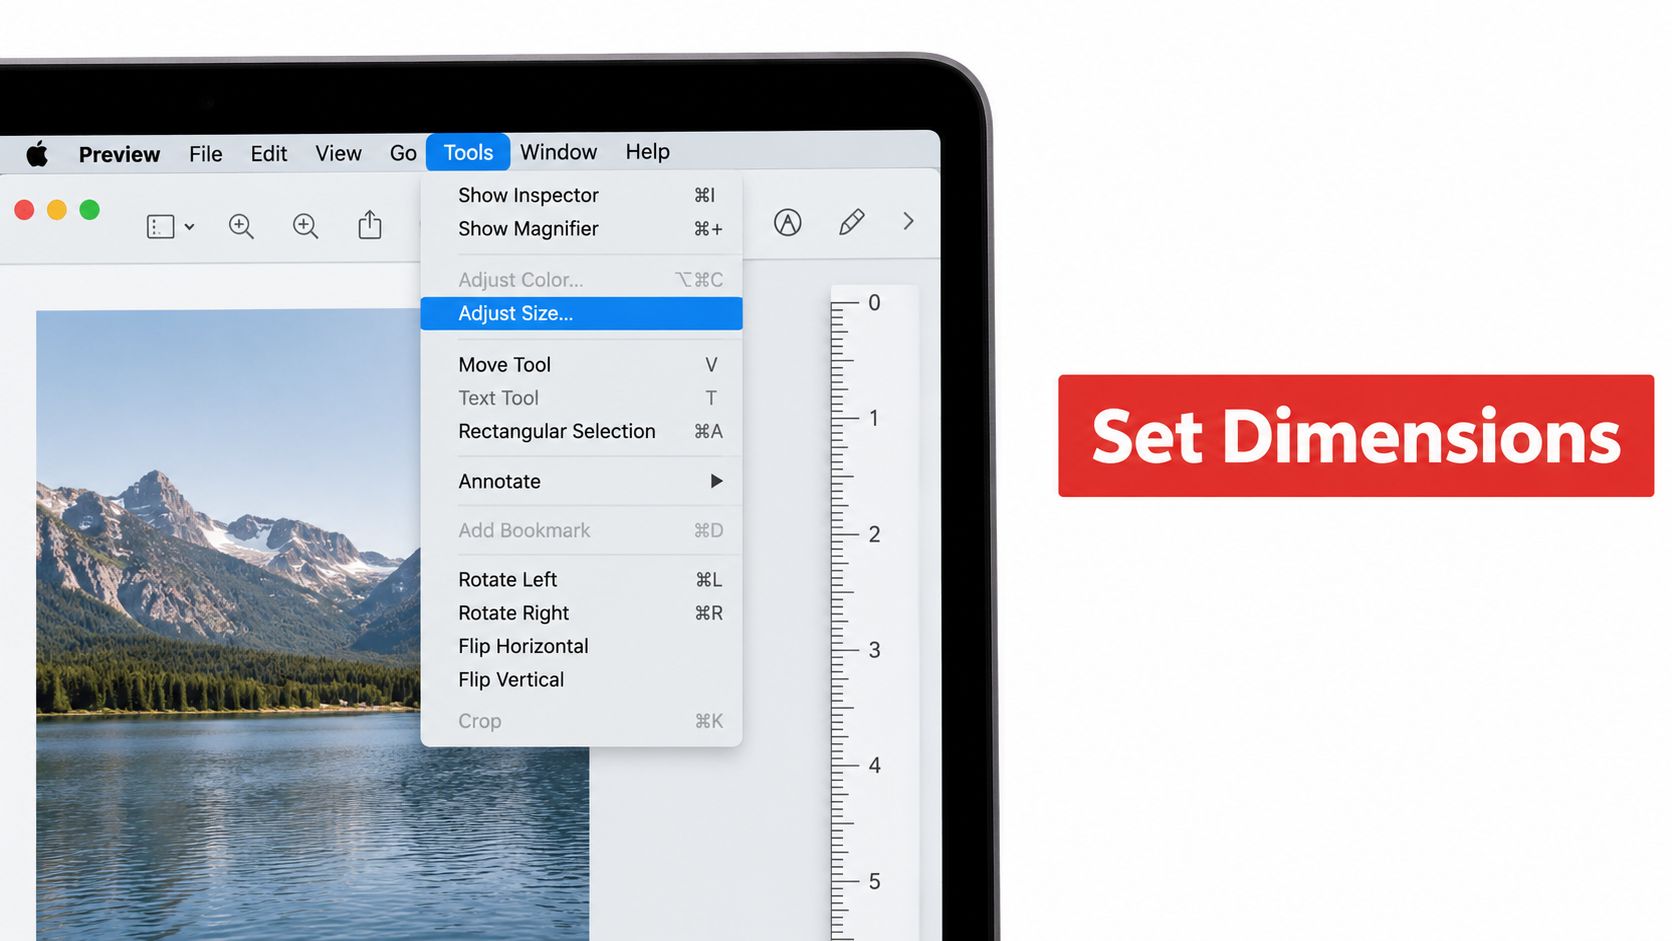
When the PDF itself must become a different paper size, use a page-geometry workflow. A print dialog's Fit or Custom Scale setting usually creates a newly printed PDF, while Acrobat's Preflight fixup permanently changes the page geometry.
Open the file in Adobe Acrobat on your Mac. Select Tools > Print Production > Preflight, choose Select single fixups, expand Pages, and select Scale pages to specified size. Enter the target short-edge width and long-edge height, then save a new copy.
Use points and preserve orientation
PDF points are resolution-independent at 1/72 inch. Adobe lists these standard page dimensions:
| Format | Width | Height |
|---|---|---|
| US Letter | 612 points | 792 points |
| A4 | 595 points | 842 points |
| Legal | 612 points | 1008 points |
Enter dimensions in the units required by the target format and keep portrait orientation in the correct order. A common error is swapping width and height, which turns a portrait page into a wide page or produces an unexpected fit.
This operation changes the page geometry rather than merely changing zoom or printer output. Reopen the saved file and check its page boxes and printed dimensions. If the document contains mixed page sizes, apply the fixup to all pages only when that's intended, or process page ranges separately.
Inspect the edges after resizing
Changing page geometry can expose problems that ordinary print scaling hides. Check the margins, crop marks, annotations, signature fields, and any content positioned close to the edge. A page can have the correct nominal dimensions and still have clipped artwork or misplaced interactive elements.
Don't uncheck proportional behavior casually in any resizing interface. Non-proportional scaling stretches the content, and the distortion is especially obvious in scans, diagrams, and branded graphics. If the target format requires a different aspect ratio, adjust the layout or margins rather than forcing the entire page into a shape it wasn't designed to occupy.
The most explicit native Mac procedure for permanently changing page size is Acrobat's Preflight workflow. For a browser-based alternative to page-box editing, see this guide to changing a PDF page size.
Comparing Native and Browser-Based PDF Resize Tools
The right tool depends on whether you value privacy, precision, or speed for a particular job. Preview is already part of macOS and works offline, which makes it the sensible first choice for compressing a personal document or creating a print copy. Its controls are straightforward, but they don't provide the same page-geometry precision as a dedicated preflight workflow.
Acrobat Pro is the stronger choice for production documents. Its documented Preflight fixup can permanently scale pages to specified dimensions, and it gives you a more explicit way to inspect and validate page geometry. It's more involved than Preview, but that extra control matters for files with strict paper specifications, crop marks, annotations, or signature fields.
A browser-based editor can be useful when you need drag-and-drop page operations without installing a Mac application. PDFWix's browser tools include page resizing, cropping, compression, and other PDF operations, with most tools processing files in the browser. If you're evaluating accessibility alongside resizing, this resource on the best PDF reader for dictation users is a useful companion.
| Feature | Preview | Acrobat Pro | Browser-based editor |
|---|---|---|---|
| File-size reduction | Built-in Reduce File Size filter | More controlled optimization workflows | Compression and optimization tools |
| Print scaling | Yes, through the print dialog | Yes, with print controls | Depends on the specific tool |
| Permanent page dimensions | Limited for PDF page geometry | Explicit Preflight fixup | Available in tools that edit page size |
| Offline privacy | Strong, files stay on the Mac | Strong when used locally | Depends on whether processing is client-side or server-side |
| Best fit | Quick personal and office tasks | Print production and precise geometry | Fast cross-platform browser work |
For a few receipts or contracts, a browser workflow can be faster than navigating several Preview menus. For a print-shop file where bleed, trim, and annotations must survive, use a tool that exposes page geometry directly and validate the result carefully. This browser PDF editor guide provides a useful reference for that type of workflow.
Quick Checklist Before You Save Over the Original
Never overwrite the master PDF immediately after resizing. Duplicate it first and use a descriptive suffix such as _resized or _A4, so you can identify the operation and recover the original if a downstream system renders the new file incorrectly.
Start with the page shape. Confirm that the aspect ratio matches the original when you intended proportional scaling, or matches the print target when you intentionally changed the format. Open the result in Preview and another viewer, then inspect a representative page at actual size rather than relying only on a reduced thumbnail.
Check the document's working parts
Run through these checks before sharing or printing:
- Aspect ratio: Confirm that circles, logos, photographs, and page margins haven't been stretched.
- Fonts: Look at headings, symbols, and line breaks to make sure the document still renders with the intended fonts rather than an unexpected substitution.
- Forms: Click through fillable fields and verify that widgets still accept input.
- Hyperlinks: Follow important links, especially if pages were reordered, cropped, or regenerated through print-to-PDF.
- Annotations: Check comments, highlights, stamps, and signatures near the page edges.
- Images: Zoom into scans and photographs to catch soft detail, pixelation, or compression artifacts.
- Color: Confirm that the output is appropriate for its destination, particularly when a document moves between screen viewing and professional printing.
A file can look fine at a glance and still fail when someone tries to complete a form or click a reference. That's why interactive elements deserve a deliberate test, not just a visual scan.
Make a final print and viewer check
Print one page if the document will be printed in quantity. Check clipping, margins, orientation, and the position of signatures or other edge-sensitive content. If you used print-to-PDF, test the saved PDF rather than the original because the conversion may have changed interactive behavior.
Open the final copy in Preview and a second viewer, such as a modern browser. A second rendering environment can reveal font, link, or page-box issues that aren't obvious in the application used to create the file.
If the PDF refuses to open, displays blank pages, or behaves strangely after export, use this guide to check for corrupted PDF files. Keep the original until the resized copy has passed every check and the recipient or printer has accepted it.
If you need to resize pages, compress a file, or prepare a new print-ready copy without installing another Mac app, visit PDFWix. Choose the browser workflow that matches your goal, save the result under a new filename, and validate the finished PDF before replacing your original.