
You're ready to submit, and the portal, inbox, or application form rejects the file. The scan looked clear on your screen, the pages are in order, and the only problem is size. That's when people grab the strongest compression setting they can find, shrink the PDF until it uploads, and discover later that small type has turned fuzzy, a signature looks smeared, or search no longer finds words that are plainly on the page.
Learning how to shrink a PDF file safely starts from the other end. Name the recipient's cap first, look at what fills the pages, and decide what quality you won't give up. A color scan, a text report, and a court exhibit shouldn't get the same treatment, because the smallest file is often the wrong file for search, print, or evidence.
Table of Contents
- Pick a Size Target Before You Compress
- How to Shrink a PDF File Step by Step
- Downsample Scans and Photos on Purpose
- Subset Fonts and Drop Unused Objects
- Know When to Stop and Split
- Check Legibility Then Send the Smaller PDF
Pick a Size Target Before You Compress
A 28 MB color scan may be clear on screen and still fail at the recipient's attachment cap. Start with the destination and its limit, then decide how much compression the pages can tolerate. The smallest possible file is the wrong target if search, print, or evidence quality matters.
For personal Gmail, Google's Gmail attachment guidance sets a 25 MB limit for attachments in a message. Larger files are inserted as Google Drive links instead of conventional attachments. The limit applies to the total message attachments, so several files share the same allowance.
Caps vary by destination. Email limits, portal rules, and filing requirements can differ, so check the recipient's current instructions before compressing. Use the table to set a working target, then match the first move to what is on the page.
Match the limit to what's on the page
| Situation | Working limit | First move |
|---|---|---|
| Personal Gmail attachments | 25 MB combined; larger files become a Drive link | Get under 25 MB or send a link |
| Email with a lower attachment cap | Check the provider's limit | Target below the stated cap |
| Job, visa, or university portal | Check the portal's stated limit | Downsample images or split the file |
| Court or filing upload | Check the court's published filing rules | Keep text and evidence legible |
| Text-only digital PDF | Often little room to save | Clean fonts and unused objects |
| Archival or PDF/A record | Follow preservation requirements | Keep required fonts and metadata |
Page content determines the safe route. Photo-heavy color scans carry more image data, so resolution is often the main size factor. Text-heavy digital PDFs may already be compact; cleaning fonts and unused objects is a better first choice than aggressive image compression. Screenshots and line art depend on sharp edges, so avoid settings that blur them.
Practical rule: a reduction of only a few percent can mean the source was already optimized. A much larger reduction can signal a change in image quality.
For archival or PDF/A records, preserve required fonts and metadata rather than chasing the smallest file. If email is the destination, use this guide to send large PDFs by email to choose a suitable delivery method when an attachment will not fit. Keep an untouched copy, and carry the recipient's stated limit into the compression steps that follow.
How to Shrink a PDF File Step by Step
A recipient's size cap sets the target, but the pages inside the PDF set the safe method. A photo-heavy scan can shrink quickly at the cost of detail; a text-based submission may have little image data to remove. Make one controlled pass on a copy, then stop when the file meets the cap without sacrificing content the recipient needs.
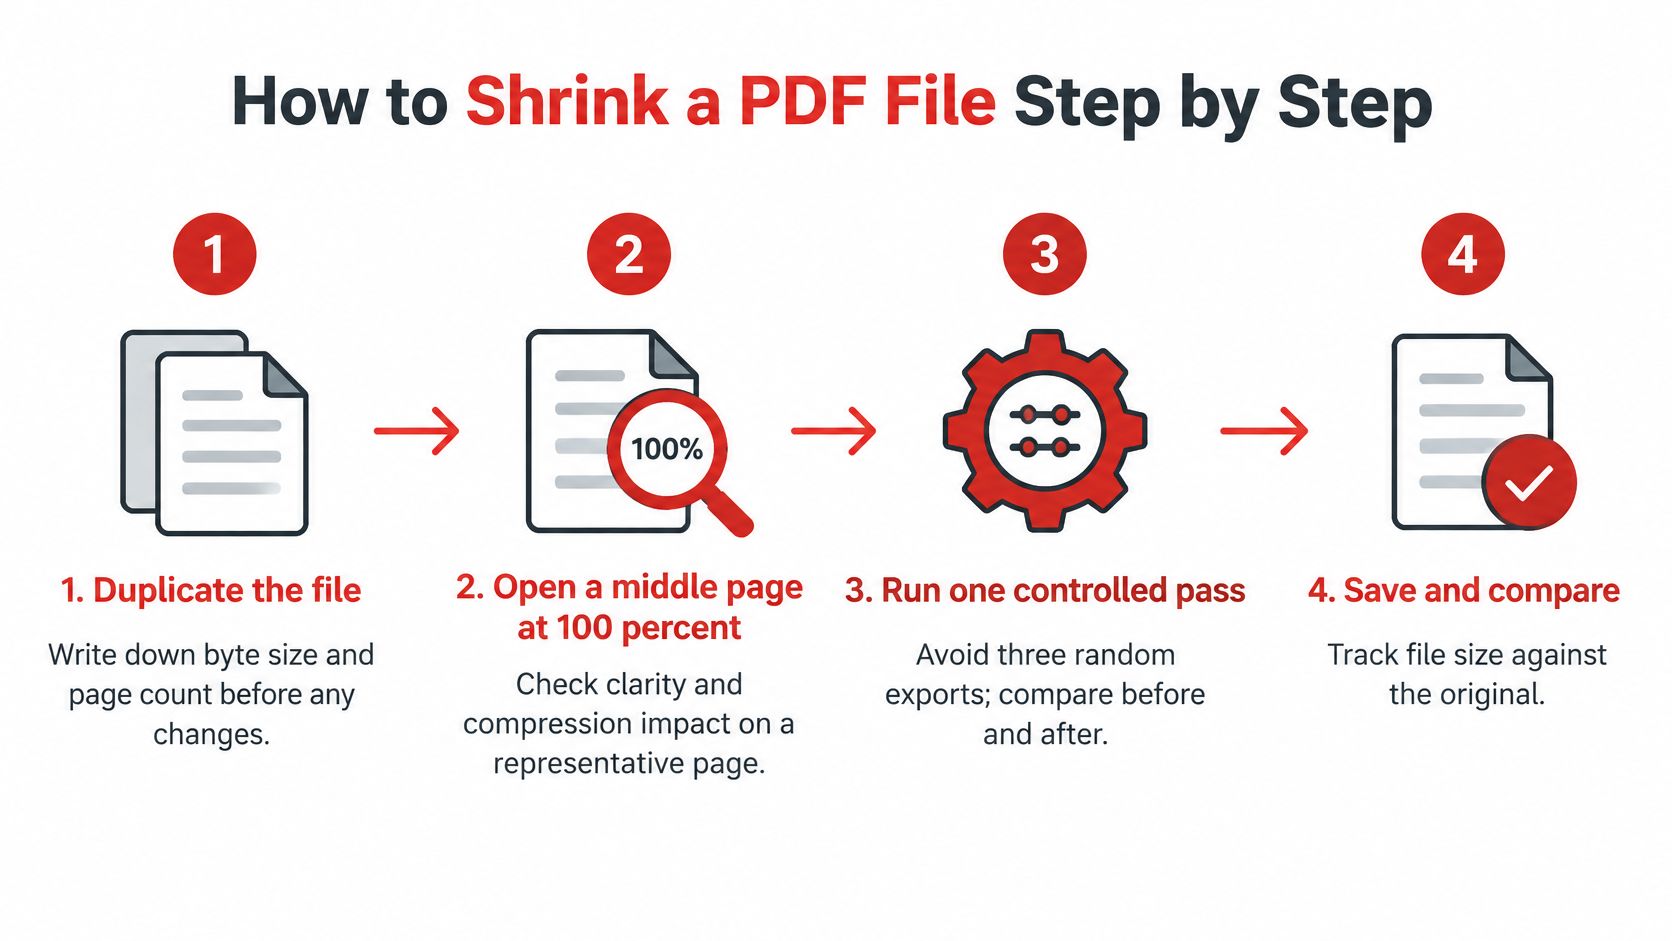
Prepare and classify the file
Duplicate the file first. Record the original size and page count, then work only on the copy. Compression can permanently discard image data, so keeping the original preserves a clean fallback.
Inspect a representative middle page at 100 percent. Decide whether the file contains scans, digitally generated text, or a mix. A cover can mislead if it has an unusually large logo or photo, so check a typical page before choosing settings.
Remove blank or duplicate pages before compression. They add file weight without contributing content. Deleting them can reduce the size without changing the legibility of the pages that remain.
Compress in the right order
Reduce oversized images, then choose compression for the content. Lower color or grayscale image resolution only when it exceeds what the recipient needs. Photographs suit JPEG or JPEG2000; flat-color illustrations are better suited to ZIP or Flate. Downsampling reduces resolution by combining pixels, while compression reduces data. Lossy settings can permanently remove image detail, which is why the original should stay untouched.
For text-heavy PDFs, consider font subsetting and removing unused objects. See Subset Fonts and Drop Unused Objects for the detailed steps.
Save the result and check it against the cap you set. The goal is a file that qualifies for submission, not the smallest possible file. If it meets the limit, avoid another compression pass.
For a browser-based option, use a PDF compressor on the copy. Select a medium setting first, then compare the result with the original. A stronger setting can reduce the file further, but may remove more image detail. Repeated lossy compression of the same images can degrade them without delivering enough additional savings to justify the loss.
Check that the PDF still supports the tasks it is meant for, such as searching, copying text, following links, using bookmarks and filling form fields. Confirm that any signature remains intact. Choose a dense text page and a page with fine detail to make the review useful.
Stop when the file meets the recipient's limit and remains usable. If you control the source document, exporting it with appropriate image settings can avoid compressing an already-created PDF. Keep the original available until the smaller file is ready to send.
Downsample Scans and Photos on Purpose
Start with the recipient's size cap and the pages inside the PDF. A photo-heavy form may shrink readily, while a page of small text, a signature, or a map can lose useful detail at the same setting. Work on a copy, and choose image settings to suit how the recipient will read or print it.
Bicubic downsampling reduces image pixel count. Then match the compression to the page: JPEG or JPEG2000 suits photographs and continuous-tone scans, while ZIP or Flate preserves the sharp edges of diagrams, screenshots, and flat-color artwork. Lossy compression discards pixel data, so check the fine details that matter for search, print, or evidence.
| Page content | Compression | Resolution guide | Watch-out |
|---|---|---|---|
| Color or grayscale photos and scans | JPEG or JPEG2000 | About 1.5 to 2 times the line screen for print; lower for screen | Compare at 100 percent and 200 percent |
| Flat-color illustrations | ZIP or Flate | Keep the original resolution if edges are already sharp | JPEG ringing on solid areas |
| Monochrome scans | Match the output device | Avoid above 1500 dpi | Extra dpi adds size, not clarity |
| Line art and small text | Prefer lossless | About 600 to 1200 ppi | Too low and characters break |
| Screenshots and schematics | ZIP or Flate, not JPEG | Set by testing the page | Block artifacts can hide labels |
For ordinary screen sharing, a lower resolution may be suitable than for print. Test small type, signatures, maps, and fine lines on representative pages before applying a setting to the whole file. Monochrome scans should match the output device; going beyond the table's ceiling typically adds file size without visible benefit. Overscanned forms can often be reduced by bringing their resolution closer to the intended reading or printing conditions. For pages captured by phone, a consistent scan to PDF workflow at an appropriate resolution can avoid carrying unnecessary image detail into the document.
Match the compression to the page
Screenshots and schematics need special care. JPEG artifacts can blur characters or obscure labels, even when the resulting PDF is much smaller. ZIP or Flate is the safer choice for solid edges and small text; compare the result at 100 percent and 200 percent before deciding.
Inspect text edges, diagrams, OCR accuracy, page dimensions, hyperlinks, bookmarks, forms, and signatures before replacing the original.
When images are still separate files, resize them before assembling the PDF with the PDFWix image tools page. This helps keep oversized source images from dictating the finished document's size. Offices sending signed pages by on-demand faxing for Illinois businesses should also preserve the legibility of names, dates, and signatures. Use the same representative pages for the final visual check, and keep the original if any important detail has become hard to read.
Subset Fonts and Drop Unused Objects
After reducing image weight, check whether fonts and document resources are adding bytes without serving the reader. Remove only objects confirmed to be unused. A recipient's size cap matters, but so does what the PDF must preserve: searchable text, stable page breaks, and reliable printing.
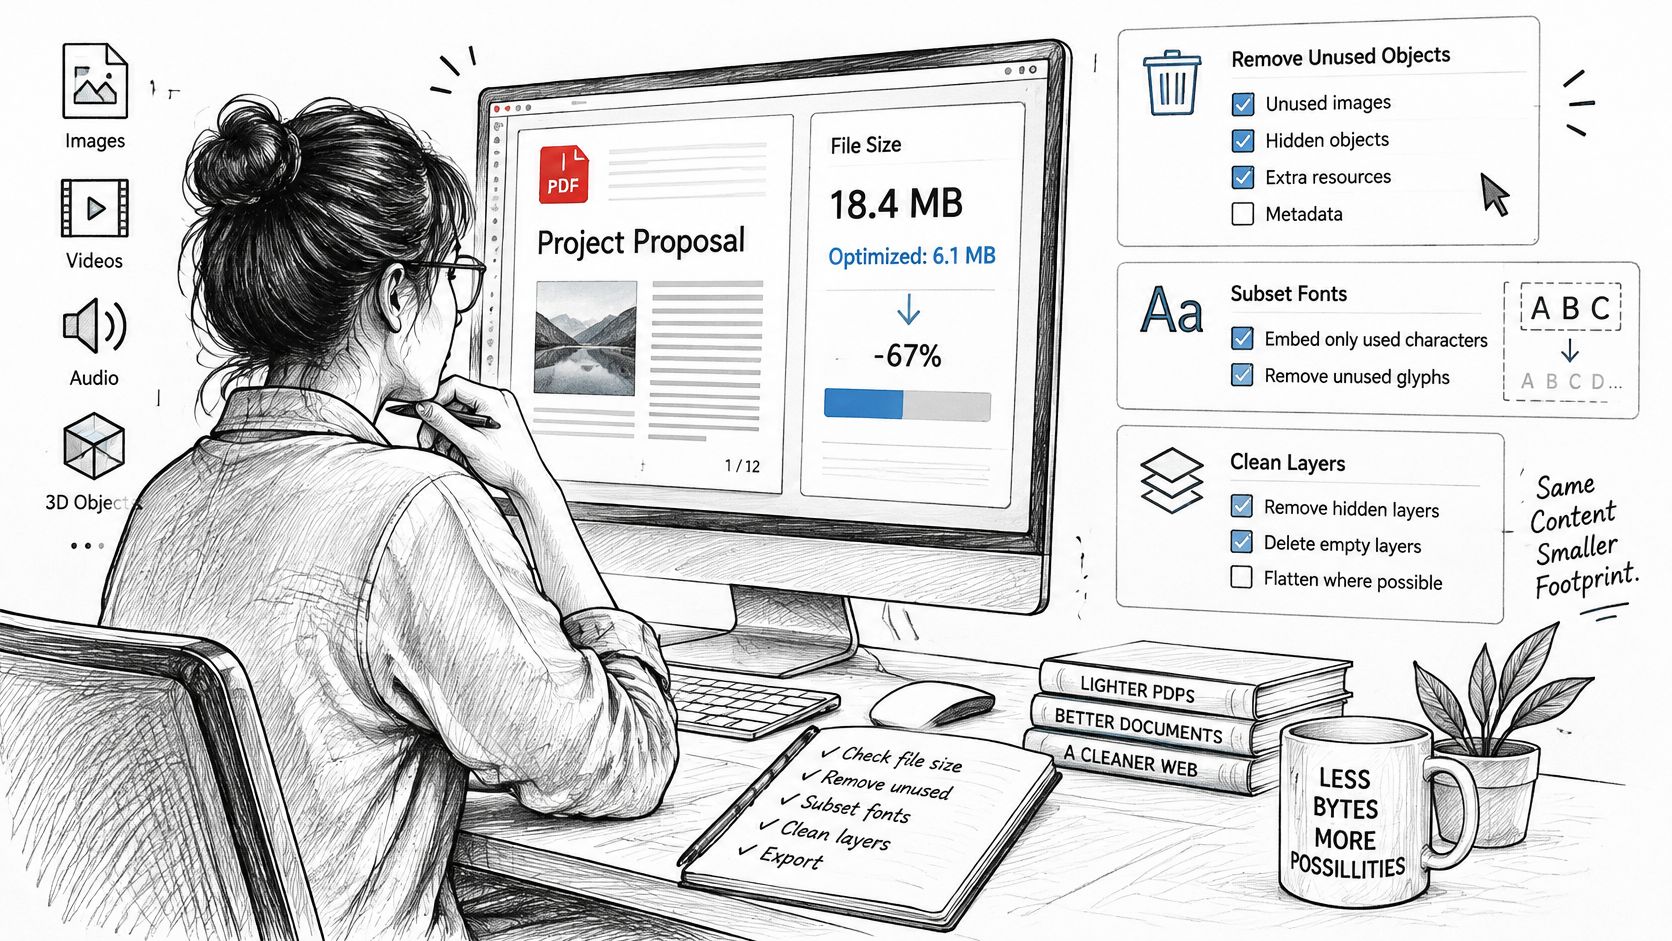
For an ordinary email or web PDF, font subsetting can retain only the characters used instead of embedding a complete font. Check the result with text search and printing, especially if the document includes names, symbols, or multilingual text. Structural cleanup, rather than image reduction, is the focus of an optimized PDF.
Keep full font embedding when the recipient's system is unknown, when the PDF contains multilingual text including East Asian scripts, or when it serves as a legal exhibit or archival interchange file. Removing font data can trigger substitution, shifting line breaks and pagination. That creates a practical problem when a reviewer needs to refer to a specific page or line.
Leave PDF/A resources intact when preservation is the goal. Embedded fonts and metadata may be required for compliance. Also, flatten transparency or interactive layers only after editing is complete, since flattening can remove the ability to change those elements.
Make structural changes one at a time, then compare the file's size and behavior. This makes it easier to identify whether a change affected a form field, annotation, or other content. Avoid stripping metadata or other objects unless you know they are unnecessary.
Before sending, open the PDF in at least two viewers. Check printing, text search and copying, OCR, accessibility tags, forms, annotations, and signatures. If the smaller file fails any of these checks, it is not ready to send.
Know When to Stop and Split
The smallest possible file is the wrong goal. Stop squeezing when another pass starts costing you readability, searchability, or evidence quality, and switch to cutting structure instead.
Compression treats text, fonts, vector graphics, metadata, and raster images differently, so results swing widely by document. An academic survey of PDF optimization reported that post-processing techniques reduced file sizes by approximately 20 percent to 70 percent for large classes of existing PDFs. Treat that range as a benchmark, not a target. A text-heavy file near the low end was probably already compact, while a scan near the high end likely paid with image detail.
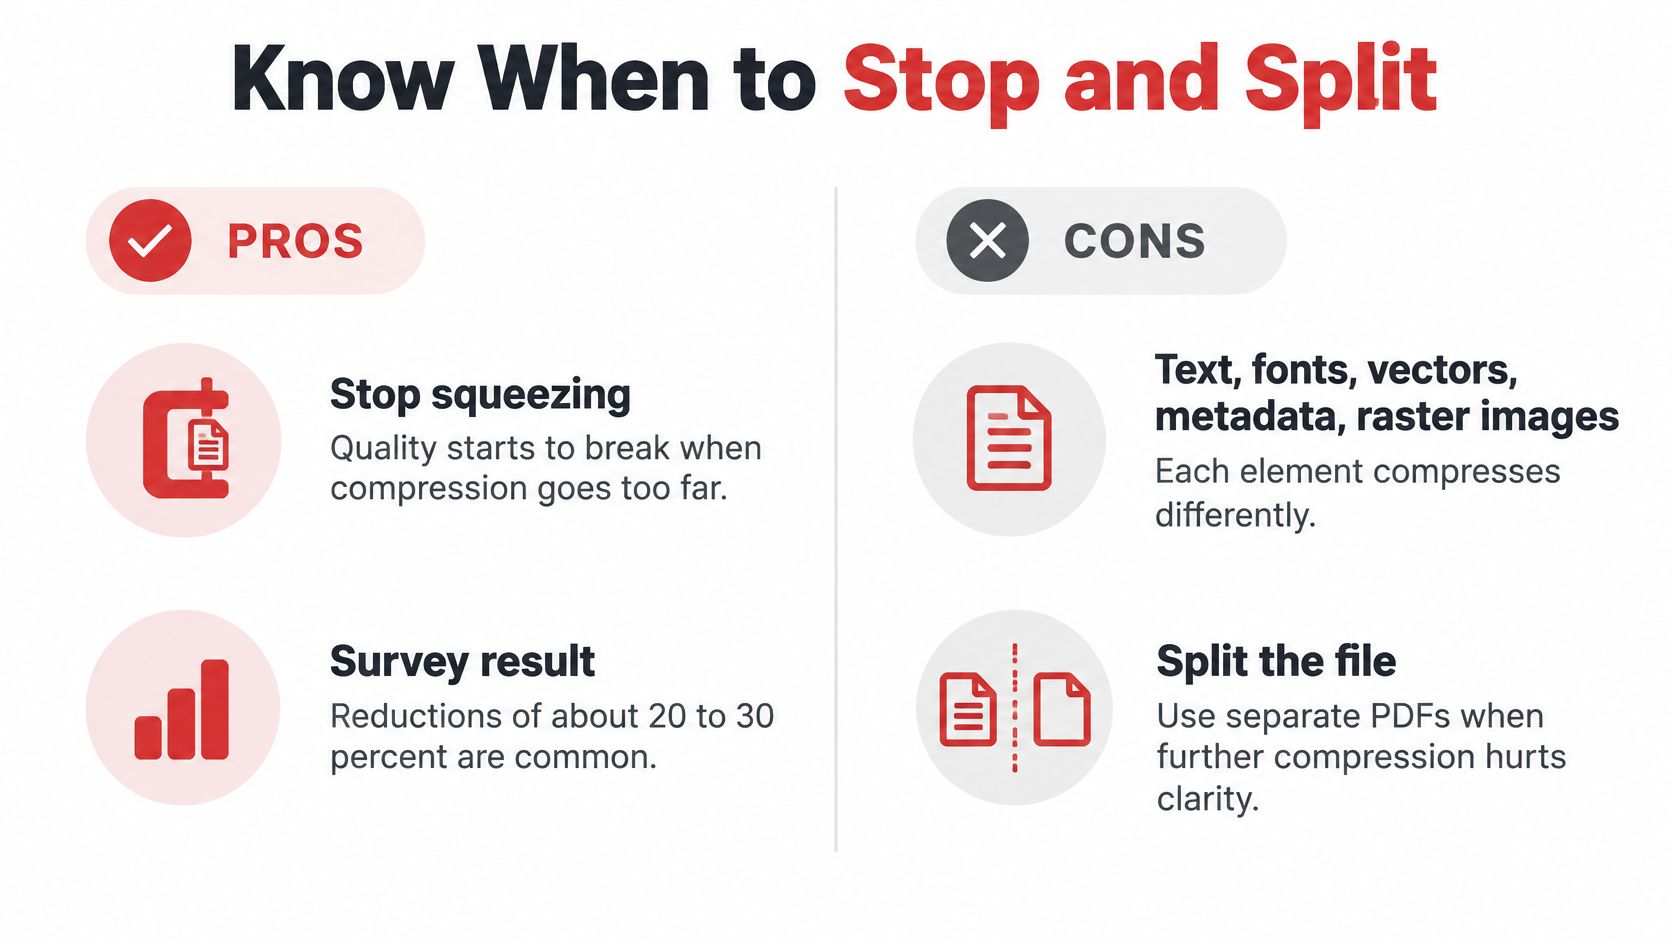
Lossless and lossy routes split here, too. Flate, also called Zip, is lossless and keeps every pixel, so diagrams, screenshots with small type, line art, and archival masters belong on it. JPEG is lossy and suits photographs, but repeating it on an image that's already JPEG compressed adds loss without a matching saving.
Preservation raises the stakes further. The Library of Congress format description for PDF notes that high-quality preservation PDFs favor searchable text, embedded fonts, lossless compression, and high-resolution images. Aggressive settings can strip searchable text, damage fine legal or medical detail, or undermine long-term reproducibility, none of which shows up in a file size readout.
Cut structure in this order
- Remove pages that carry nothing: delete blank, cover, and duplicate pages with the remove pages tool. Scanner packets often hide several empties between exhibits.
- Crop wide empty margins: trim blank scan borders if all content stays safely inside the crop. Check page numbers and stamps near edges first, since they sit exactly where crops cut.
- Extract or split the packet: pull a required exhibit or chapter with the extract pages tool, or use a split PDF pass to divide a long packet into the parts the form asks for.
- Add an OCR text layer where rules allow: searchable text can replace heavy image-only pages for some submissions, but never do it in a way that discards a signature's appearance.
Splitting has one clear limit. When a cap covers everything you send together, dividing one file into three attachments in the same message gains you nothing. It helps when each portal field, exhibit slot, or message carries its own ceiling, so read the submission rules before you cut.
Field judgement: check page order after pulling pages out. A missing schedule fails a submission just as surely as a size error, and nobody warns you about it.
If the original is already lean and the cap still can't be met without harming the record, send the clean copy plus a split set and explain why. Reviewers accept a reasoned split far more readily than an unreadable page they have to send back.
Check Legibility Then Send the Smaller PDF
Before attaching anything, put the original and the new file side by side. Confirm the new size sits under your written limit, then do the reading test that decides whether the shrink worked.
Read one text page, one photo or scan, and one page with a signature or small print at 100 percent and 200 percent. Search for a word you know is on the page, click one link, and check that bookmarks and form fields survived. Print or preview a page if your recipient will print it, because paper exposes softness that a bright screen hides.
If a field, bookmark, or signature vanished, go back to the untouched copy. Use a lighter image setting or skip font removal, and run the pass again from clean material. If high compression would smear a scan, split or remove pages instead of forcing the smallest setting, and keep accessibility in mind by checking reading order against guidance like this overview of PDF accessibility.
For the compression step itself, PDFWix's tool offers selectable levels such as medium or high, and a 10 to 50 MB PDF often shrinks to 2 to 5 MB with minimal visible quality loss. Most PDFWix tools, including compress, run entirely in the browser and the file is never uploaded, which suits contracts and ID scans you wouldn't hand to a random server. Start at medium, run the side by side checks on the output, and only step up if the cap demands it.
When the checks pass, send the smaller file and archive the original. Keep that original until the recipient confirms acceptance, because a portal rejection or a request for a clearer exhibit sends you straight back to it.
Now put this workflow to work on the file sitting in front of you. Write down your recipient's cap, run a medium compression pass, and check the result page by page before anything leaves your hands. Visit PDFWix to compress, split, and clean up your PDF in the browser, then send a file that's small enough to upload and still clear enough to defend.