
You've just scanned a stack of forms, contracts or assignment pages, opened the PDF to send it, and found an empty page after almost every real one. The file looks longer than it should, you'll waste paper if you print it, and you're not sure whether one of those near-white pages holds a faint signature you can't afford to lose. That's the situation where a careful manual check beats a quick guess. To remove blank pages from PDF files safely, you need to confirm each page is empty, delete only those pages from a copy, and then prove the cleaned file still reads in the right order.
Table of Contents
- Remove Blank Pages from a PDF in Five Steps
- Telling a Real Blank Page From One That Only Looks Empty
- Clearing Blank Backs from Duplex and Batch Scans
- Blank Page Removal or PDF Repair
- Verifying and Saving the Clean Copy
Remove Blank Pages from a PDF in Five Steps
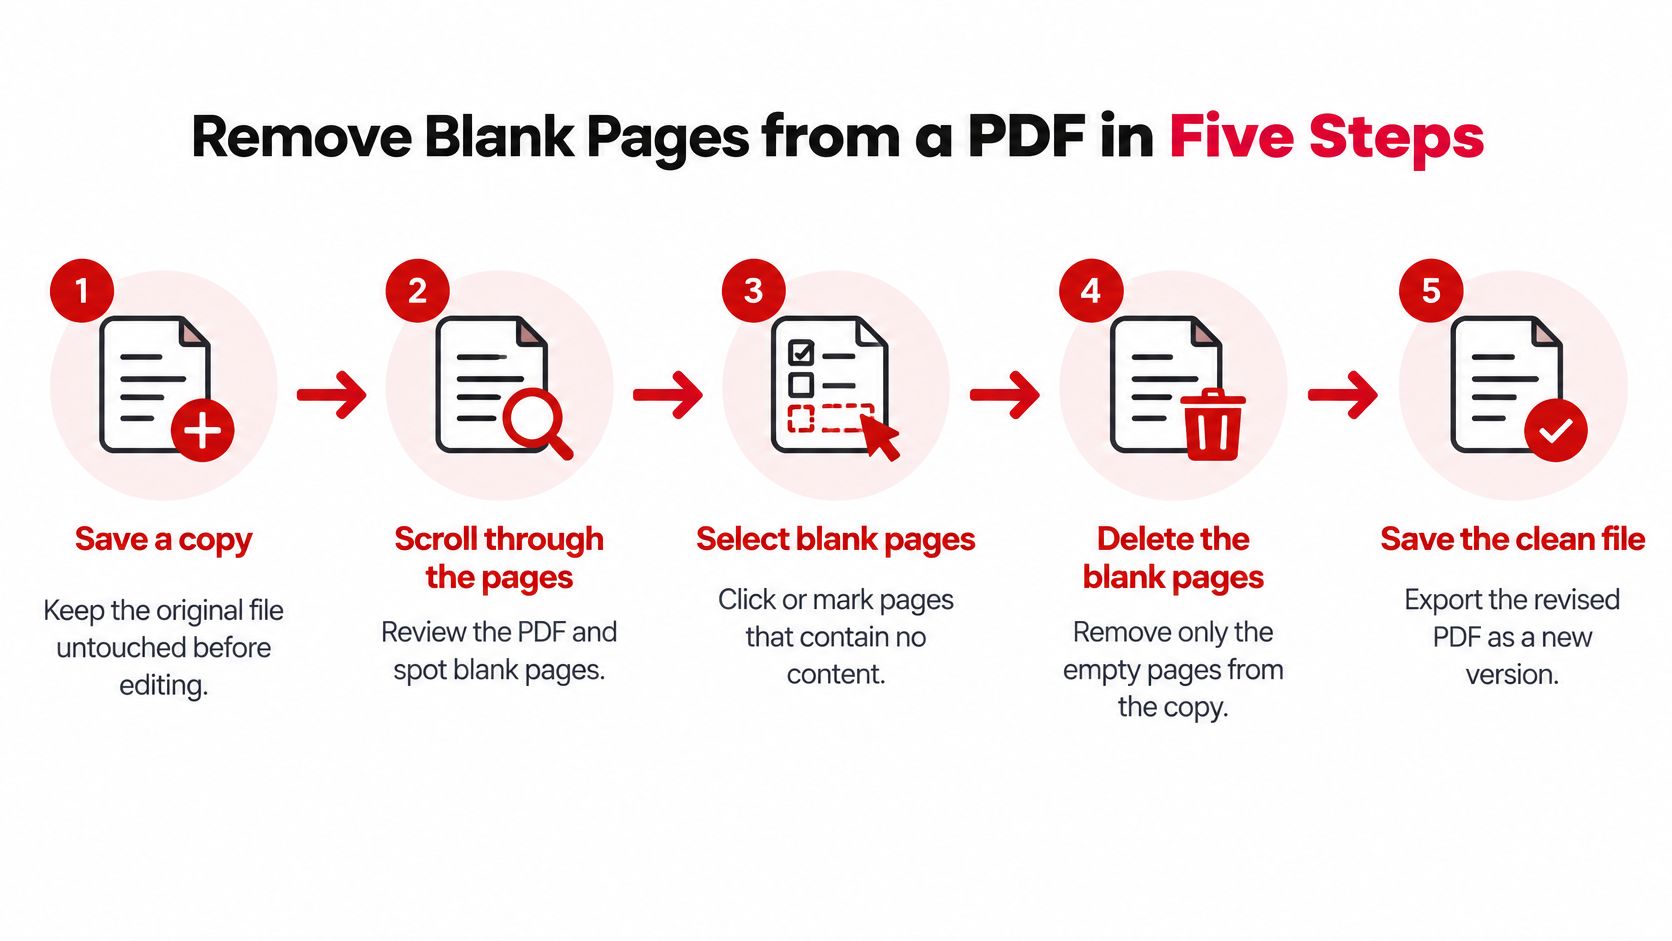
Start by saving a copy of the original file and leaving that original untouched. Every deletion happens in the copy, so a wrong call costs you nothing more than starting again.
The Five-Step Routine
- Scroll the thumbnail view and flag candidates. Work through the whole file once and write down every page number that looks empty, including the page after each scanned sheet. Don't delete anything yet.
- Zoom each flagged page to at least 200%. Check corners, margins and the centre for faint ink, stamps or initials before you call a page blank.
- Delete only the confirmed pages. Open the PDFWix Remove Pages tool, add your copy, and select only the page numbers on your confirmed list. Check the tool page for its current controls and whether your selection can be entered in one pass.
- Download and reopen the new file. Don't judge the result from a preview alone. Open the downloaded copy as its own document.
- Compare the page count. Your new total should equal the original total minus the number of pages on your list. If it doesn't match, stop and recount before sending anything.
Why Each Step Earns Its Place
The thumbnail pass gives you a complete candidate list in the original numbering. That's essential, because page numbers shift once you start deleting, and a list built midway will point at the wrong pages.
The zoom check exists because thumbnails lie by omission. A page can hold invisible text, an annotation, a form field or a nearly white scan and still look empty at small size. Adobe's guide to deleting pages from a PDF follows the same manual logic, inspect thumbnails, verify candidates, delete confirmed pages and save a new output. In Acrobat, that sequence runs Organize Pages, select page thumbnails, Delete, confirm, Save, and at least one page must remain in the document.
If you also need to reorder what's left after deletion, that's a separate pass with a tool to organize PDF pages rather than part of the removal itself. Keep the tasks separate so you can verify each change on its own.
Working rule: A page leaves the file only after it passes the zoom check. If you haven't looked at it closely, it stays.
One caution before you begin. Some blank pages are intentional. A cover separator, a verso page, a signature page or a legally required exhibit divider can look like waste while serving a purpose in the record. Flag those on your list as keepers rather than candidates, and your five steps will clean the file without restructuring it.
Telling a Real Blank Page From One That Only Looks Empty
Every flagged page requires one decision, keep or delete, and the thumbnail cannot decide for you. A blank page is not a fixed property of the file. It is a judgment you make after checking, and the cost of making a mistake runs one way. Deleting an empty page saves a little clutter, but deleting a page with a faint pencil note, a pale stamp, or a light signature can change what a legal, HR, or academic record states.
A detailed guide to removing blank pages makes the same point about detection. Judging a page only by whether it has selectable text misclassifies faint marks, scanner shadows, hole-punch marks and nearly white scanned content, so a review step before deletion isn't optional.
| Page type | What it looks like | Check before deleting | Usual action |
|---|---|---|---|
| Blank reverse side from a duplex scan | Empty page between content pages | Zoom in to confirm no ink, stamp or print on the back | Remove if the original was single-sided |
| Faint pencil note or light initials | Near-white page with a small smudge | Zoom in and compare with the paper original | Keep, since it may matter for records |
| Pale stamp or light signature | Almost blank page with one small mark | Check the paper original or the document's sign-off trail | Keep |
| Scanner shadow or hole-punch mark | Grey edge or dark spot near one margin | Check whether the rest of the page is empty | Remove only if nothing else is on the page |
| Intentional separator or verso page | Blank page placed on purpose between sections | Check the document's sections, index or original layout | Keep |
| Page with comments only | Blank content but a visible comment marker | Open the annotations panel and read the comments | Keep the page and see the guide on removing comments |
How to Run the Check
Zoom to 200% or more and scan the margins first, because shadows, punch marks and edge stamps sit there. Then check the centre for light handwriting. If you still have the paper original, hold it against what you see on screen. A page that carries only comments or annotations isn't blank in any sense that matters, since it holds reviewer content, and our guide to why PDF files show as blank covers the related case where pages render empty for other reasons.
Treat each doubtful page the way analysts treat gaps, by validating missing data decisions for analysis instead of assuming absence means nothing was there. When in doubt, keep the page and write down its number so you can revisit the call later.
Clearing Blank Backs from Duplex and Batch Scans
Most batch problems start at the scanner, not in the PDF. When duplex scanning stays on for single-sided originals, the machine captures the blank back of every sheet, so your file alternates between content and empty pages from start to finish.
Brother's support answer on blank scan pages confirms this directly. Two-sided scanning captures both sides of each sheet, a blank reverse side appears as an extra page, and the recommended correction is to disable duplex scanning when the source documents are single-sided.
Fix the Source First
- Check the duplex setting. Turn it off when every original in the stack is single-sided, and leave it on only for double-sided paper.
- Decide whether to rescan. A small batch is often quicker to rescan cleanly. A large batch isn't, so clean the file you already have instead.
For cleaner technique on the next run, our guide to scanning multiple pages covers setup choices that prevent this pattern forming at all.
Clean the Existing Batch
List every blank page number in the original numbering first, then delete them in one pass if the tool accepts several page numbers in a single selection. Check that on the tool page before you rely on it. If it doesn't, work from the highest page number downward, so earlier numbers don't shift under you as pages come out. Deleting one at a time from the front is how good pages get removed by mistake.
Watch mixed batches closely. A double-sided original tucked into a single-sided stack may have a real blank back that belongs in the record, or faint content on a reverse side you'd otherwise assume is empty. Split the batch by document before cleaning, count the expected pages for each one, and keep your removed-page list as an audit trail beside the cleaned file.
That discipline matters downstream too. Teams that later turn invoices into accounting data depend on page sequences matching the paper, so a sloppy cleanup creates reconciliation work long after the scan is forgotten.
Blank Page Removal or PDF Repair
These two fixes solve different problems, and picking the wrong one wastes time or makes things worse. Deleting a page removes one page object from the page sequence of a healthy file. A repair addresses damaged structure or broken rendering in a file that won't open or displays incorrectly.
| Symptom | Likely cause | Fix |
|---|---|---|
| One blank page between content pages | Duplex scan of a single-sided original | Remove that page after the zoom check, and disable duplex for future scans |
| Blank page at the end of the file | Trailing paragraph marks in the source document | Remove the last page, or delete the marks in the source and export again |
| Text spills onto an extra blank page after conversion | Layout overflow from margins or spacing | Adjust margins in print preview in the source, then export again |
| File opens but every page looks blank | Rendering or structure problem | Open in a second viewer, then try a repair before removing pages |
| File will not open or shows errors | Damaged file structure | Repair the file, then check the page count and content |
Reading the Symptoms
A single blank page inside an otherwise healthy file is a removal job. The file opens, neighbouring pages display normally, and one page object carries no visible content. Take it out and move on.
A file where every page looks blank is telling you something different. That's a rendering or structure problem, not fifty separate blank pages waiting for deletion. Open it in a second viewer first. If it still misbehaves, run it through a PDF repair tool before you remove anything, because deleting pages from a damaged file can bury the evidence of what's wrong.
If the file opens and one page is empty, remove the page. If the file itself misbehaves, repair comes first and page removal waits.
When the Source Document Is the Real Culprit
Blanks at the end of a file or between sections often originate before the PDF existed. Trailing paragraph marks push an empty final page out of a word processor, and tight margins or spacing spill a nearly invisible overflow page during conversion. Deleting that page from every exported copy treats the symptom forever. Fixing the marks, margins or print preview in the source and exporting again treats the cause once.
Set expectations for repair. A repair can recover readable pages from many damaged files, but it can't guarantee full recovery of every page, link or form field. After any repair, check the page count and read through the content before you trust the result. Only then decide whether any blank pages remain to remove.
Verifying and Saving the Clean Copy
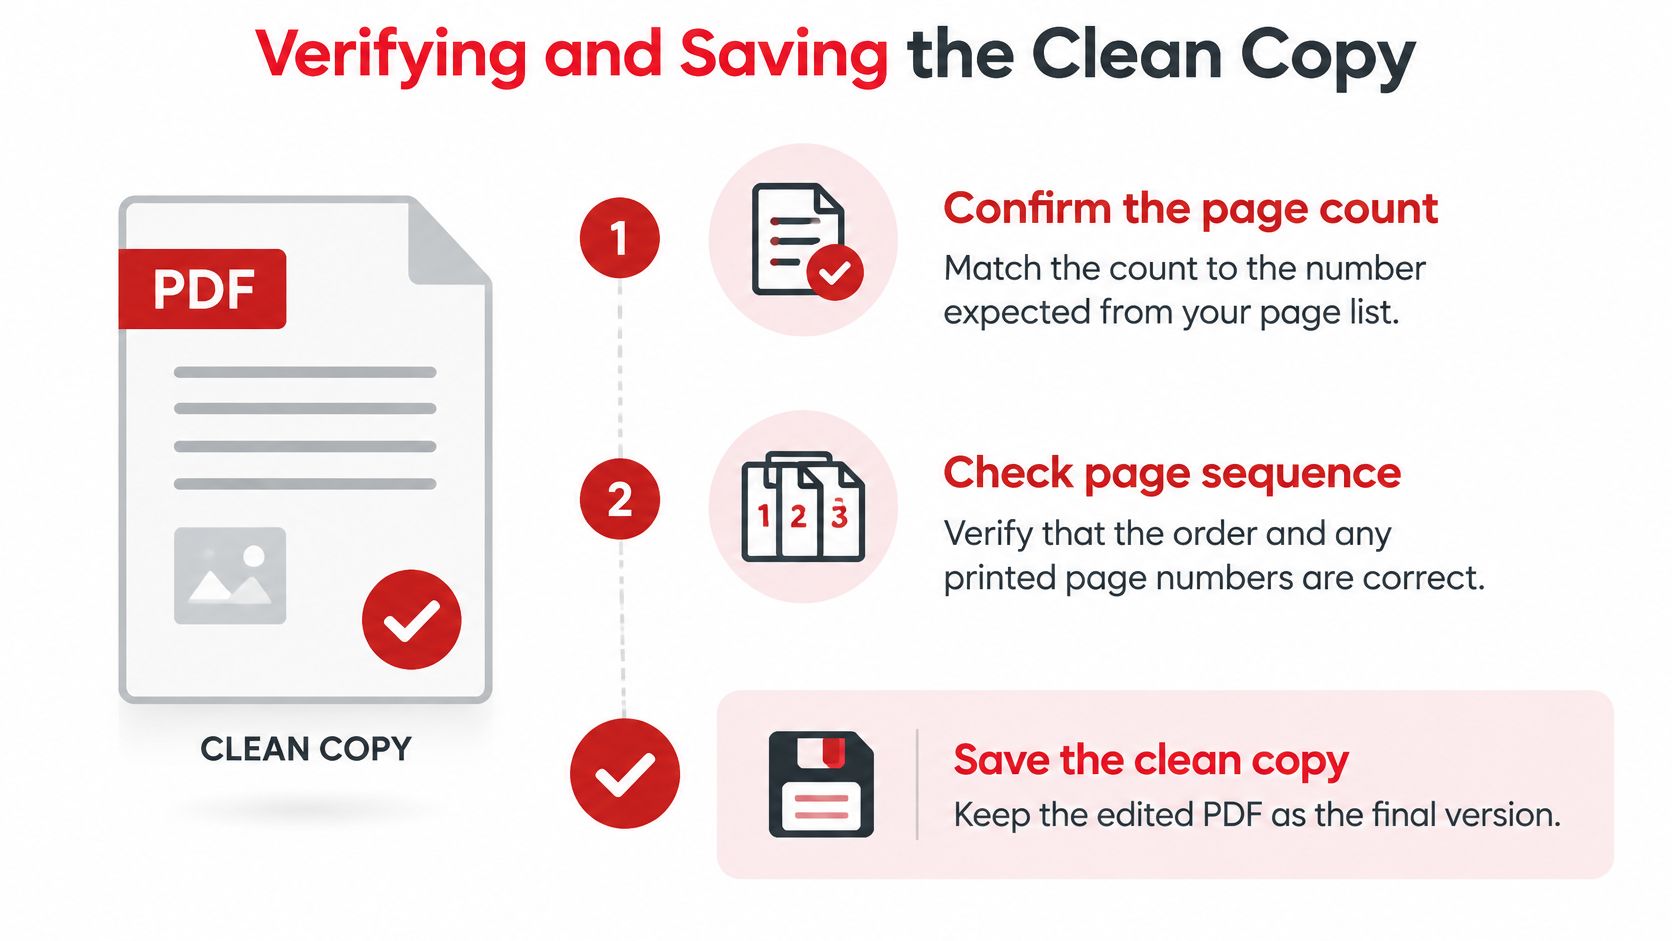
A clean page list doesn't prove a clean file. Deleting pages can shift what bookmarks point at, disturb form fields and leave printed numbers out of sequence, so run this checklist on the cleaned copy, never on the original.
The Verification Checklist
- Confirm the page count. It should match the number you expected from your page list.
- Check page sequence and printed numbers. If numbers printed on the pages now run out of order, renumbering is a separate task covered by our guide to numbering pages in PDF.
- Test bookmarks and internal links. Deleted pages can shift their targets, so click through the main ones.
- Inspect form fields and signature blocks. Deleting pages from signed or form-heavy files may affect them, so confirm they still display and accept input.
- Compare file sizes. Removing pages doesn't always make a file smaller, since some saves append changes instead of fully rewriting the document, a point detailed in this troubleshooting guide on blank pages inserted into PDFs.
- Review metadata. Remove author or project details you don't want to share before the file leaves your hands.
- Reopen in a second viewer. Confirm every kept page displays correctly, and if anything renders oddly, our guide to checking for corrupted files helps you tell a display glitch from real damage.
This routine suits everyday paperwork wherever it travels, including scanned documents people handle while accessing U.S. mail while abroad, where resending a corrected file isn't always quick.
The Privacy Limit You Shouldn't Cross
Deleting a page from the visible page list is not the same as sanitizing the file. If a removed page held sensitive content, use a dedicated redaction or sanitization step and confirm its method first. Our Redact PDF tool rasterises the page, so the underlying text is removed rather than only covered. Proving data is gone from the underlying structure may still need a specialist check for legal, medical or identity documents.
Finish by keeping the original in an archive folder, naming the verified copy with a version suffix such as v2, and sending only that copy. Keep your removed-page notes with it, so anyone reviewing the file later can see exactly what came out and why.
When you're ready to act on your confirmed page list, PDFWix gives you browser tools to remove blank pages from PDF files, reorganize what's left and check the result, without installing software. Open the Remove Pages tool, work from your copy, and send only the verified version.